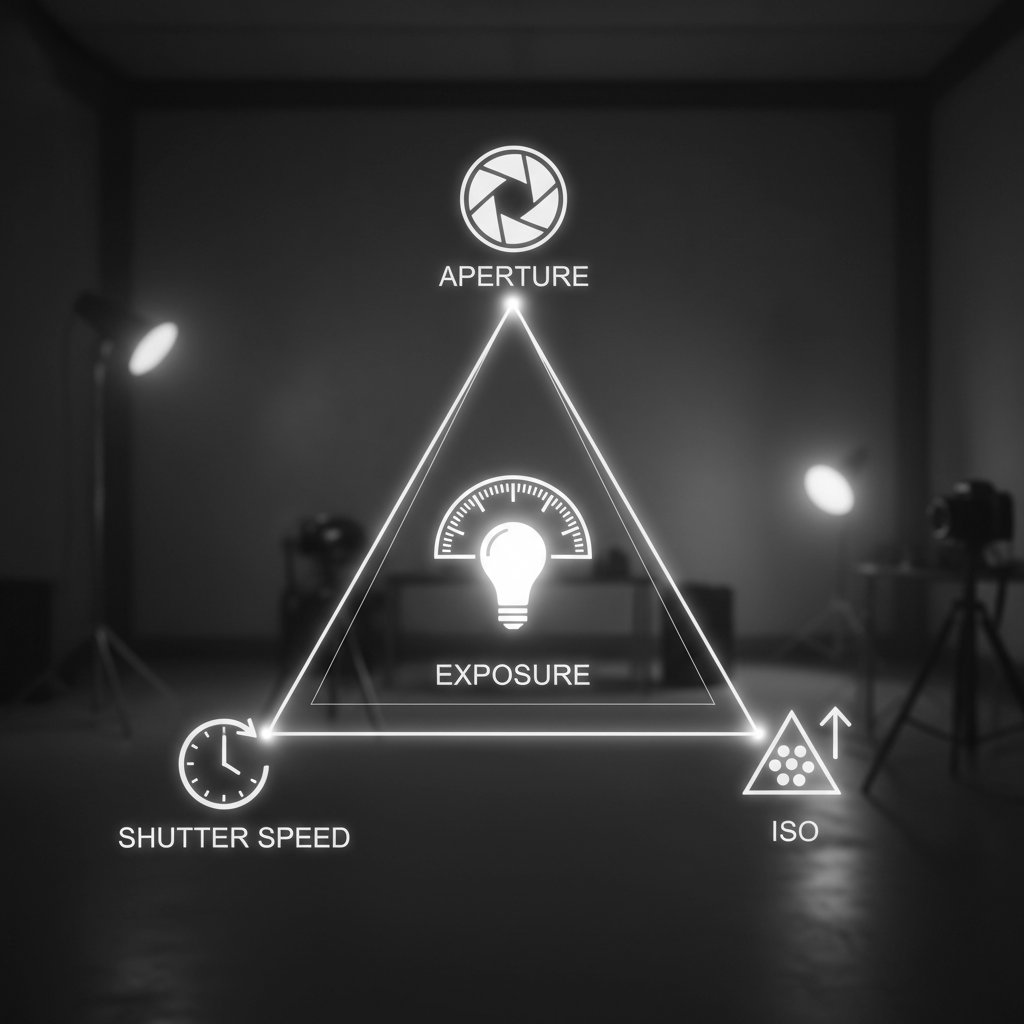
Understanding the Exposure Triangle
Aperture, Shutter Speed & ISO Explained Simply
If you want to move beyond Auto mode, this is the concept that changes everything.
The exposure triangle refers to the three camera settings that control how bright or dark your image appears:
Aperture
Shutter Speed
ISO
These three settings work together to control light. Change one, and you must adjust at least one of the others to maintain a balanced exposure.
Photography is simply the control of light — and the exposure triangle is how you control it.
1. Aperture
Controls light and depth of field
Aperture refers to the opening inside your lens. It determines how much light enters the camera.
It is measured in f-stops (for example: f/1.8, f/4, f/8, f/16).
How it works:
Lower f-number (e.g. f/1.8)
Larger opening
More light
More background blur
Higher f-number (e.g. f/11)
Smaller opening
Less light
More of the scene in focus
When to use:
Portraits → Lower f-number (for soft background blur)
Landscapes → Higher f-number (for sharp detail throughout)
Aperture affects both brightness and how much of your image is in focus.
2. Shutter Speed
Controls motion and light duration
Shutter speed determines how long the camera’s shutter remains open.
It is measured in seconds or fractions of a second:
1/1000 (very fast)
1/250
1/60
1/10
1" (one full second)
How it works:
Fast shutter speed (e.g. 1/1000)
Freezes motion
Lets in less light
Slow shutter speed (e.g. 1/10 or 1")
Blurs motion
Lets in more light
When to use:
Moving subjects → Faster shutter speed
Low light → Slower shutter speed (with tripod if needed)
Creative blur (water, movement) → Slower shutter speed
Shutter speed controls whether motion appears sharp or blurred.
3. ISO
Controls light sensitivity
ISO determines how sensitive your camera’s sensor is to light.
Common ISO values:
100
200
400
800
1600
3200+
How it works:
Low ISO (100–200)
Less sensitive to light
Cleaner image
Best for bright conditions
High ISO (1600+)
More sensitive to light
Brighter image
Introduces grain (noise)
When to use:
Bright daylight → Keep ISO low
Indoors or low light → Increase ISO if needed
Always try to keep ISO as low as possible while maintaining correct exposure.
How the Triangle Works Together
If you change one setting, you must compensate with another.
For example:
If you lower your aperture (let in more light), you may need to:
Increase shutter speed
Or lower ISO
If you use a faster shutter speed (less light), you may need to:
Open the aperture
Or increase ISO
The goal is balanced exposure without sacrificing creative control.
A Simple Starting Formula for Beginners
In daylight:
ISO 100
Aperture f/4–f/8
Adjust shutter speed until exposure looks correct
In low light:
Open aperture (lower f-number)
Slow shutter speed
Increase ISO only when necessary
Common Beginner Mistakes
Increasing ISO too quickly
Using a shutter speed that’s too slow (causing blur)
Forgetting that aperture affects depth of field
Changing all three settings at once
Adjust one setting at a time and observe what changes.
Final Thought
The exposure triangle is not about memorising numbers — it’s about understanding the relationship between light, motion, and focus.
Once you understand how aperture, shutter speed, and ISO work together, you move from letting the camera decide — to making intentional creative choices yourself.
That’s the point where photography truly begins.